Hello there, budding coders! When coding, do you feel like you’re in a mess of files, changes, and feel overall disorganized? Like when you make updates, you’re afraid to lose something important when you’re overwriting it in the new version? Fear not! We’re here to introduce you to a friendly companion in your coding journey – Git!
Git? What’s that?
Imagine Git as a super organized filing system for your code. It’s like having a personal librarian who keeps track of every version of your project, so you can jump back and forth without losing your way. Think of it as your coding time-travel assistant!
Version Control Simplified
Git is like that librarian, diligently recording every change you make to your code. Whether you’re adding new features, fixing bugs, or trying out new ideas, Git takes notes for you. With Git, you can always go back in time, just like you’re reading different chapters of a book.

GitHub: Your Coding Playground
Now, imagine a place where you can showcase your code, work with others, and learn together. That’s GitHub, your virtual coding playground. It’s like your favorite social media platform, but for code! And probably a lot less toxic!
Collaboration Made Easy
GitHub is like a giant digital bulletin board where you can pin up your code projects. Not only can you share your code with others, but you can also team up with fellow coders to create something amazing. It’s like having a friendly coding club where everyone is welcome!

Getting Started with Git and GitHub: A Quick Guide
Step 1: Create a GitHub Account
- Sign up for a free GitHub account at GitHub.com.
- Think of this as creating your own coding profile.
Step 2: Create a New Repository
- Click the “+ New” button on your GitHub dashboard.
- Name your repository and provide a short description.
- Choose to make it public or private (public is recommended for beginners).
- Check the “Initialize this repository with a README” box.
- Click “Create repository.”
Step 3: Clone Your Repository
- Click the green “Code” button on your repository’s page.
- Copy the repository URL.
- Open your computer’s terminal or command prompt.
- Navigate to the directory where you want your project folder.
- Run
git clone <repository-url>(replace<repository-url>with the copied URL).
Step 4: Make Your First Commit
- Open your project folder.
- Make changes to your README file (e.g., add your name).
- Save the file.
- In the terminal, navigate to your project folder.
- Run
git add README.md. - Run
git commit -m "Initial commit: Added my name to README".
Step 5: Push Your Changes
- Run
git push origin mainto share your changes on GitHub.
And there you go! You’ve taken your first steps into the exciting world of Git and GitHub. Keep exploring, making changes, and creating commits as you continue your coding journey. Happy coding!
Setting the Streak: The Commit Challenge
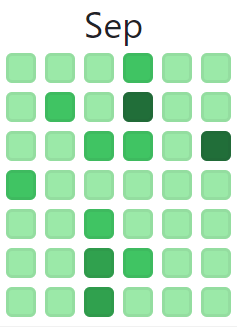
Meet your fellow coder, Ryan! The author of this blog. I’m on a journey to complete a 100-day commit streak on GitHub and at the time of this writing, on day 48 in a row! It’s like a coding adventure, one commit at a time. Committing code every day keeps your coding skills sharp, just like practicing a musical instrument.
The Power of Consistency
Setting a commit streak, even if it’s just one small change per day, is a great way for new programmers to build a coding habit. Just like starting your day with a healthy walk outside, a small code commit keeps your coding skills growing.

But remember, even superheroes need rest. Setting smaller goals that fit your routine helps you avoid burnout. A few well-placed commits per week can work wonders without overwhelming you.
Conclusion: Your Journey Begins
Git and GitHub are your trusty companions on your coding adventure. Git helps you organize your code like a pro, while GitHub turns coding into a social experience. Setting a commit streak can be your secret weapon for building coding skills.
So, what are you waiting for? Dive into the world of Git and GitHub, start your coding journey, and watch your skills grow!
Remember, every coding superhero started as a beginner. Embrace the journey, learn from your mistakes, and soon you’ll be the coding hero you’ve always wanted to be. Happy coding!


